For the complete documentation index, see llms.txt. This page is also available as Markdown.
A23 Zero Offset
Definition
This function performs manual zero-point compensation to correct internal system timing offsets. The setting unit is ns (nanoseconds), not a flow unit.
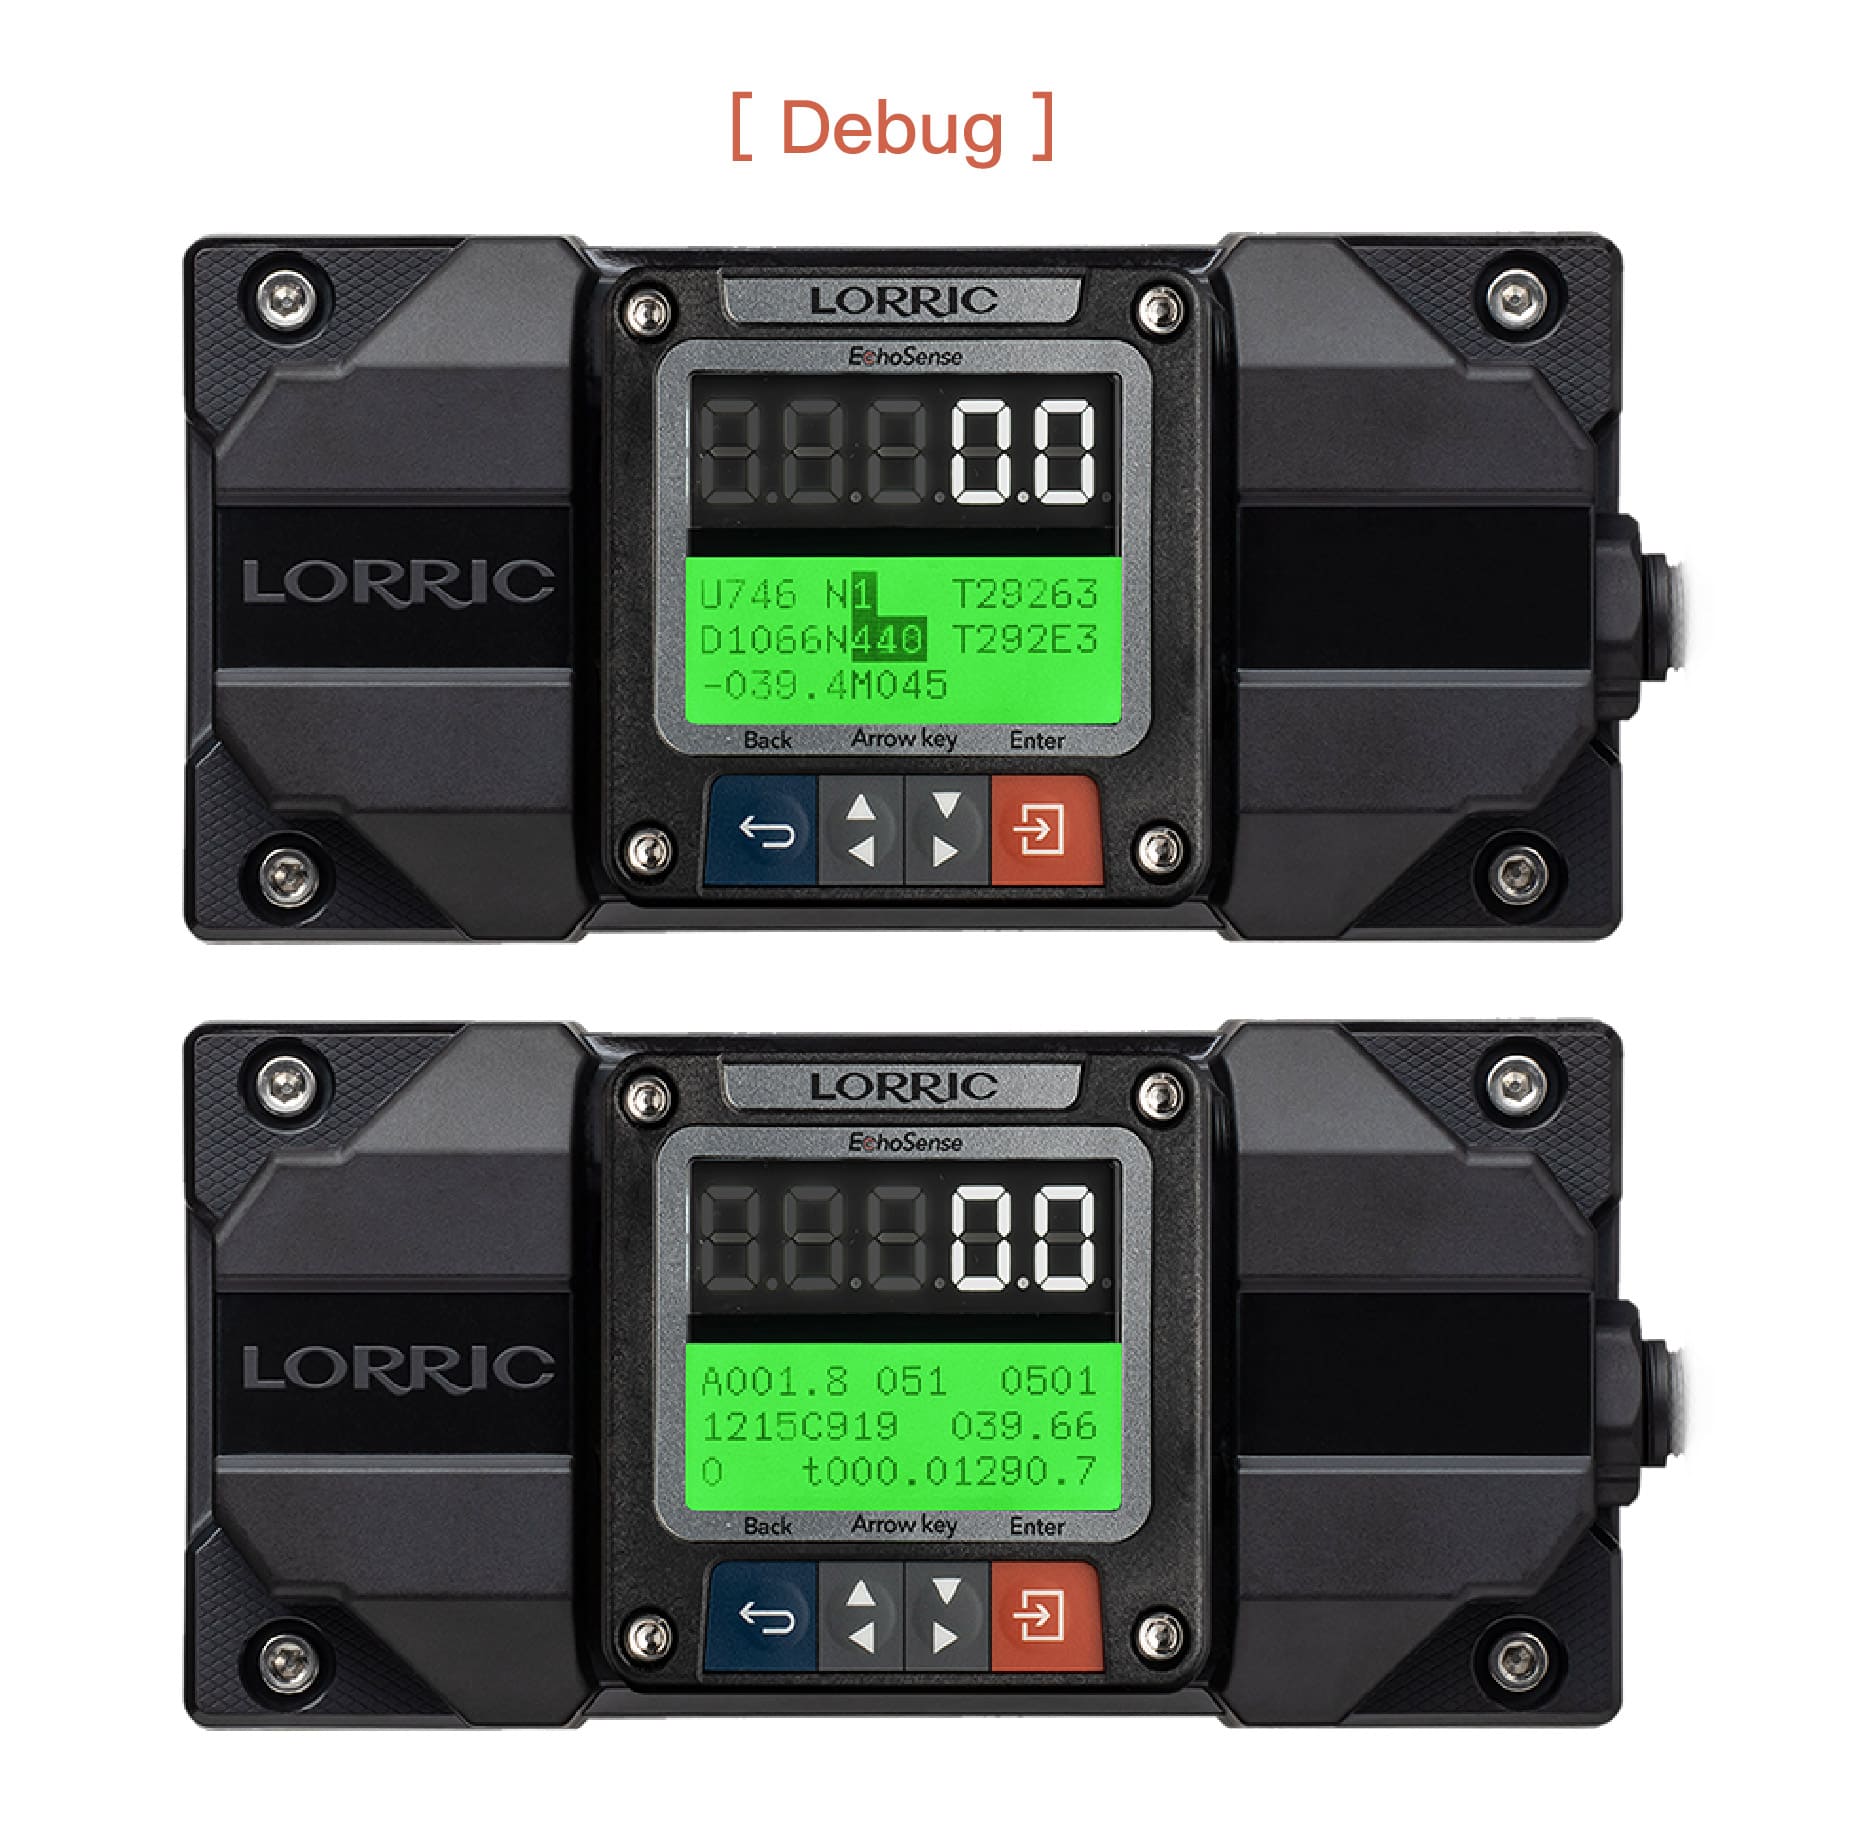
To configure, refer to the value displayed at the bottom-left of the main screen User Debug Page, and enter that value into A23.
Return to the main screen and use the arrow keys to navigate to the User Debug Page.
Observe the value in the bottom-left (highlighted in yellow). The value may fluctuate slightly; it is recommended to observe for a while and enter the average value into A23.
Debug Screen(actual values may vary depending on conditions)

Notes
N/A
Operation Procedure
Button Functions (Click to Expand)
When the main screen is displayed in green backlight, the four buttons function as follows:
Blue Button (leftmost): Return, exit, or save settings.
Gray Direction Buttons:
Left Gray: Previous Page, decrease value, or select item
Right Gray: Next Page, increase value, or select item
Orange Button (rightmost): Rightmost button: Enter settings, edit, or confirm selection
Do not hold buttons for extended periods to avoid damage.
Button functions may change depending on the operation context to improve usability or prevent accidental presses.
A23 Options, RS485 Values, Read/Write Commands, and Formats
Input Range of This Parameter
Corresponding Values
RS-485 Value
Default
0
-
Minimum
-100
-
Maximum
100
-
Refer to the Read/Write Memory List for the Modbus command format. This parameter uses the float32 data format.
A23 Zero Offset Setting Steps
• From the main screen(green backlight),
press Orange Button(Setup) to enter settings (orange backlight).
• Use Gray Arrow Buttons to select A. Measurement, press Orange Button(Enter).
• Use Gray Arrow Buttons to select A23 Zero Offset, press Orange Button(Enter).
• Use Gray Arrow Buttons to choose the digit to adjust(highlighted in dark gray).
• Press Orange Button(Edit) to enter adjustment mode.
• Adjust digits: Left Gray Button to increase, Right Gray Button to decrease.
• Press Orange Button(Set) to confirm each digit; repeat for other digits as needed.
• After all digits are set, press Blue Button(Save).
Confirm by pressing Orange Button(Save) (or Blue Button(NOT) to cancel).
• Press Blue Button(ESC) to return to the main screen(green backlight).