> For the complete documentation index, see [llms.txt](https://docs.lorric.com/qr/llms.txt). Markdown versions of documentation pages are available by appending `.md` to page URLs; this page is available as [Markdown](https://docs.lorric.com/qr/fp-as310-r-english-v5/parameters/a-measurement-setup/a02-scale-factor.md).
# A02 Scale Factor
### Definition
Sets the correction method for instantaneous flow. Default: Simple Mode, using the formula:
Corrected Instantaneous Flow = A02 × Measured Instantaneous Flow − A09
Parameters A09 (Correction Mode) and A02 (Scale Factor) allow adjustment of flowmeter reading deviations.
$$
\text{Corrected Instantaneous Flow} = A\_{02} \times \text{Measured Instantaneous Flow} - A\_{09}
$$
Calibration Examples(Click to Expand)
**1. Error Caused by Liquid Density**
**Example – 50% Sulfuric Acid**\
Assume the liquid is sulfuric acid with a specific gravity of 1.4.\
Actual measured weight: 26 tons. The flow meter displays 20,004 L.\
Converted weight: 20,004 × 1.4 = 28,005.6 kg (≈ 28 tons) \
→ the reading is higher than the actual value.
**Step 1: Adjust the A02 scale factor**
$$A\_{02} = \frac{\text{Actual Weight}}{\text{Flow Meter Displayed Weight}}$$ = $$\frac{26\ \text{tons}}{28\ \text{tons}} \approx 0.928$$
Set **A02 = 0.928**, then the flow meter–calculated weight ≈ **25.98 tons**, close to the true value.
**Step 2 – Fine adjustment using A09:**
* After adjusting A02, readings may be accurate at **high flow**, but small deviations can remain at **low flow** or when the pump starts.
* Adjust **A02** to compensate for fixed offset errors. For example:
* If readings consistently **exceed** the true value by **0.1 ton**, set **A02 = 0.1**, and the system will automatically subtract this from the calculated weight.
* If readings consistently **fall short of** the true value by **0.1 ton**, set **A02 = - 0.1**, and the system will automatically add this value to the calculated weight.
**2. Error Caused by Analog Output**
**Example**\
The user is using the analog output and finds that the receiving device (e.g., PLC) does not match the value shown on the flow meter.
The meter display shows **0** (no flow in the pipe), but the output current is **4.1 mA** instead of the standard **4.0 mA**.\
After conversion at the receiving end, this results in an incorrect flow reading of **0.98 L/min** (zero offset).
**Step 1: Use Simulation Mode to Check for Scaling Error**
If the displayed flow value appears incorrect (for example, a flow reading when no liquid is present), first use Simulation Mode to verify whether a scaling error exists.\
Refer to the Simulation Mode section for detailed operation.
Enable **F02 Simulation Mode**, then go to **E06** and enable the analog output content (recommended: **Flow Rate**).\
Next, enter **F01** to set the simulated flow value and observe the reading on the receiving device.
For example, when the simulated value is set to **60 L/min** but the receiving end shows **58.41 L/min**, this indicates an overall scaling error (reading too low).
*After testing with Simulation Mode, it can be confirmed that the issue is not only a zero offset, but also an output scaling error.*
**Adjust the A02 scale factor**
$$A\_{02} = \frac{\text{Actual Weight}}{\text{Flow Meter Displayed Weight}}$$ = $$\frac{26\ \text{tons}}{28\ \text{tons}} \approx 0.928$$
Set the A02 value to 1.027. After this adjustment, the flowmeter’s converted reading shows a weight of approximately 58.42, approaching the true value of 60.
**Step 2: Eliminate the Remaining Fixed Offset (Zero Point Shift)**
After adjusting A02, the readings are accurate at high flow rates, but small deviations may still occur at low flow rates or when the pump starts at a fixed flow. To correct this **fixed offset error**, you can fine-tune the A02 value.
**Adjusting A02 to Correct Flow Values**
For example, after the user exits simulation mode and the flow returns to zero, if the receiving end still shows a reading of 0.98, set A02 to +0.98. The system will automatically subtract this value from the calculation, effectively zeroing the meter’s reading.
### Notes
* A02 cannot accept negative values.
### Operation Procedure
Button Functions(Click to Expand)
The main unit has **four buttons**. The **bottom line (Line 3)** of the LCD displays the current function of each button. Under normal operation, the button functions are as follows:
* **Blue Button:** Leftmost button: Return, exit, or save settings.
* Gray Direction Buttons:
* **Left Gray:** Previous Page, decrease value, or select item
* **Right Gray:** Next Page, increase value, or select item
* **Orange Button:** Rightmost button: Enter settings, edit, or confirm selection
{% hint style="danger" %}
**Do not hold buttons for extended periods to avoid damage.**
{% endhint %}
{% hint style="info" %}
Button functions may change depending on the operation context to improve usability or prevent accidental presses
{% endhint %}
Calibration Offset Function(Click to Expand)
> Used to correct flowmeter reading deviations.
>
> **Related Parameters:** **A02:** Scale Factor, **A09:** Offset Flow
{% stepper %}
{% step %}
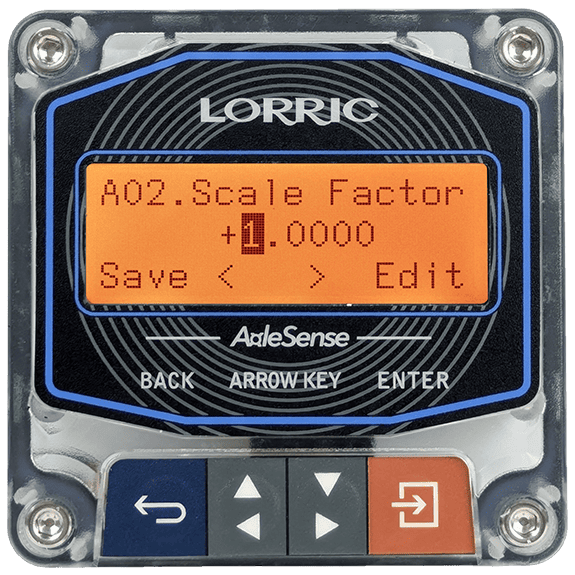
### A02 Scale Factor Setting
```
A02 Scale Factor Setting Steps
• From the main screen(green backlight),
press Orange Button(Setup) to enter settings (orange backlight).
• Use Gray Arrow Buttons to select A. Measurement, press Orange Button(Enter).
• Use Gray Arrow Buttons to select A02 Scale Factor, press Orange Button(Enter).
• Use Gray Arrow Buttons to choose the digit to adjust(highlighted in dark gray).
• Press Orange Button(Edit) to enter adjustment mode.
• Adjust digits: Left Gray Button to increase, Right Gray Button to decrease.
• Press Orange Button(Set) to confirm each digit; repeat for other digits as needed.
• After all digits are set, press Blue Button(Save).
Confirm by pressing Orange Button(Save) (or Blue Button(NOT) to cancel).
• Press Blue Button(ESC) to return to the main screen(green backlight).
```
{% endstep %}
{% step %}
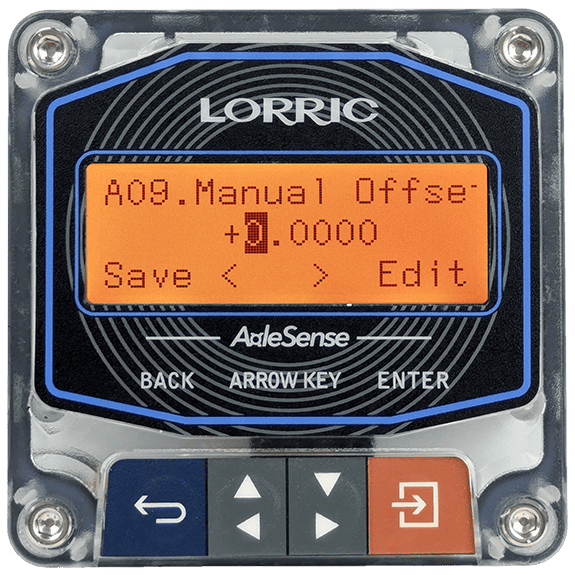
### **A09 Manual Offset Setting**
```
A09 Manual Offset Setting Steps
• From the main screen(green backlight),
press Orange Button(Setup) to enter settings (orange backlight).
• Use Gray Arrow Buttons to select A. Measurement, press Orange Button(Enter).
• Use Gray Arrow Buttons to select A09 Manual Offset, press Orange Button(Enter).
• Use Gray Arrow Buttons to choose the digit to adjust(highlighted in dark gray).
• Press Orange Button(Edit) to enter adjustment mode.
• Adjust digits: Left Gray Button to increase, Right Gray Button to decrease.
• Press Orange Button(Set) to confirm each digit; repeat for other digits as needed.
• After all digits are set, press Blue Button(Save).
Confirm by pressing Orange Button(Save) (or Blue Button(NOT) to cancel).
• Press Blue Button(ESC) to return to the main screen(green backlight).
```
{% endstep %}
{% step %}
### Calibrate Verification
Verify whether the calibration result meets expectations by checking if the calibrated flow value matches the target value. If not, readjust K03 (Scale Factor) or K04 (Flow Offset) and repeat steps 2–4.
The system automatically calculates the calibrated instantaneous flow using the formula:
$$
Corrected Instantaneous Flow = A02 (Scale Factor) × Measured Instantaneous Flow − A09 (Offset Flow)
$$
{% endstep %}
{% endstepper %}
### A02 Options, RS485 Values, Read/Write Commands, and Formats
| Parameter Input Range | Corresponding Values | RS-485 Value |
| --------------------- | -------------------- | ------------ |
| Default | +1.0000 | - |
| Minimum | 0.001 | - |
| Maximum | 1000 | - |
---
# Agent Instructions
This documentation is published with GitBook. GitBook is the documentation platform designed so that both humans and AI agents can read, navigate, and reason over technical content effectively. Learn more at gitbook.com.
## Querying This Documentation
If you need additional information that is not directly available in this page, you can query the documentation dynamically by asking a question.
Perform an HTTP GET request on the current page URL with the `ask` query parameter, and the optional `goal` query parameter:
```
GET https://docs.lorric.com/qr/fp-as310-r-english-v5/parameters/a-measurement-setup/a02-scale-factor.md?ask=&goal=
```
`ask` is the immediate question: it should be specific, self-contained, and written in natural language.
`goal` is optional and describes the broader end goal you are ultimately trying to accomplish on behalf of the user. GitBook uses it to tailor the answer towards what is most useful for that goal.
The response will contain a direct answer to the question and relevant excerpts and sources from the documentation.
Use this mechanism when the answer is not explicitly present in the current page, you need clarification or additional context, or you want to retrieve related documentation sections.
 **Orange Button:** Rightmost button: Enter settings, edit, or confirm selection
{% hint style="danger" %}
**Do not hold buttons for extended periods to avoid damage.**
{% endhint %}
{% hint style="info" %}
Button functions may change depending on the operation context to improve usability or prevent accidental presses
{% endhint %}
**Orange Button:** Rightmost button: Enter settings, edit, or confirm selection
{% hint style="danger" %}
**Do not hold buttons for extended periods to avoid damage.**
{% endhint %}
{% hint style="info" %}
Button functions may change depending on the operation context to improve usability or prevent accidental presses
{% endhint %}